
How to get started in watercolour for £0
If like me you get interested in lots of new things you probably find that as your craft box (another name for your house) gets fuller your wallet gets emptier.
I swear all us crafty creative people are the same when it comes to this. I'd never stuck to anything until I started watercolour and got completely hooked on how easy and hypnotising and relatively mess free it can be.
So here is my attempt at a guide on how to get started cheaply, a few of the sacrifices and compromises you'll be making, and where to potentially move onto when you have a few more pounds (or someone asks what you want for your birthday!). I'm not joking with the Poundland suggestion below by the way, you could get started for £3 and see if you like it.
Don't forget to try your local craft swap group for all these items if you have one. Loads of towns have them and they're full of lovely people looking to swap or give away craft supplies. Ok onto the real post...
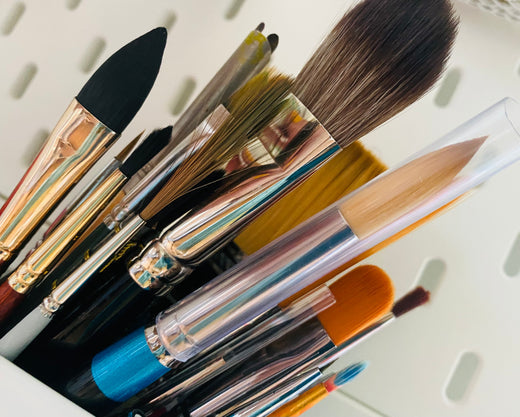
Brushes

I only ever use synthetic brushes which saves money, there's absolutely no need to buy real hair brushes in my opinion. Real hair brushes are more expensive and the animals thank you for avoiding buying them. Ideally I'd recommend starting with two different size brushes. One small/medium and one fatter absorbent one for sloshing bigger washes about. If you want to treat yourself to a third then a long thin brush (rigger) is good for stems!
I love brushes with a nice point because you can get nice shaped leaves and petals from them, but only once you start using them will you figure out what you like and need and that's when it all spirals!
Free - your finger tips, butter knife, old toothbrush for flicking, pastry brush, cotton buds, old paint brushes from the garage, old bank card.
Low cost - Poundland, your kids craft brushes (where I started!), my website shop where I've got some great round brushes for £2.50 each.
Higher cost - This is where you can pop to your local art shop, even £5-£10 will get you started but as you can imagine that adds up once you want one of every type of springiness and every shape and the bigger the brush size the more they add up. I would strongly suggest to only buy one or two at a time because it's only as you put the hours in that you get stronger opinions on what you love and need in a brush and choosing gets easier.
Paint

You can use anything that will move with water, and yes you will absolutely get more options for granulation, lightfastness and all sorts of other lovely things if you add a bit more money but it's not essential for getting started. You can make your money go further by buying your primary colours in more expensive brands and then mixing all the other colours. But I find that is off-putting for beginners, and also for lots of experienced painters! (There's a deep dive into the colour theory of having 3 warm primaries and 3 cool primaries for the colour geeks, over at the Jacksons Art blog). For us mere mortals, I think that choosing a few tubes of exciting colours to top up whatever palette you started with works fine. The main thing is that if you love the colours then the ideas will come.
Free - food colouring, ink cartridges, kids paints, tea water, instant coffee!
Low cost - Poundland or the vibrant 12 colour watercolour palette by Koh-I-Noor. Really intense inky colours, great value.
Higher cost - There is soooo much choice here and as a colour lover I get very excited by new paints. I started out with a Windsor and Newton student set, and now my favourite brand is Daniel Smith because of the vibrancy of the colours, I love the granulating paints especially and the jewel tones. Also there are stunning handmade paints out there by Campbella, Reneeissance Colours and so many more. There are tonnes of amazing expensive paints around and they're really fun to try but really unnecessary when starting other than because they're exciting. If I'm in a creative slump sometimes a new colour will light me up again.
Paper

This seems the least exciting but can make a big difference to the ease of your painting and how nicely pigment moves and the whole thing dries. In fact, I'd say it's the best place to put a bit of extra money early on as it'll make the whole rest of the process more enjoyable!
Free - unless someone gives you some nice watercolour paper for free these options won't be great, but printer paper, sketchbooks, margins of magazines or old notebooks are an option. But they'll warp with water so I'd advise saving these free options for doodling rather than painting. Local craft swap groups are amazing, if you can find someone in a craft group to swap unused materials with from past hobbies even better!
Low cost - Poundland, Lidl and other low cost options are available and I use them for certain purposes (colour testing and painting with my kids), but they will warp and buckle when they get wet, which means your colours and water will pool which is frustrating as the detail will be tricky. But it's not impossible, just bear in mind if it's hard it's not that you're doing anything wrong it's that the paper isn't helping you out!
Higher cost - I love 300gsm (thick/heavy) paper or thicker, which means it won't warp as much. To start with a watercolour pad is lovely as you can leave paintings attached to keep them all together and track your style as it develops, I started with A5 then got bigger as I felt like switching things up. When I'm treating myself in a sale I'll get Arches 100% cotton or similar but only when it's on a good discount. Quality bamboo paper is also nice, or there are vegan options, and if you go for a gummed block it means the paper is stuck together all the way around so you don't have to tape it down and it's less likely to warp and buckle with water. There are so many options!
Tutorials

Lots of people find that sooner or later they either need someone to either get them started or provide a new perspective. There are a million tutorials and courses out there on YouTube and social media if you'd like to paint a scene exactly like the artist does who has recorded the video. You can learn every technique for free online now, and I do this regularly to learn a specific skill.
If you want to learn to let go and enjoy the process without too much thought, really sink into the relaxation and mindful side of watercolour, then I run zoom sessions focussed on enjoyment, with tips and techniques included. These are suitable for all levels and ages.
Free - I have lots of Instagram ‘tiny tutorials’ and you can find never-ending free YouTube tutorials to follow.
Low-cost - I have live open zoom sessions every week starting from just five pounds if you are on my VIP email list, where you learn to enjoy watercolour instead of stress yourself out with where you think you should be. Learn to use the process to relax through antiperfection. I also run online workshops for those who want to take on a bigger challenge, zoom sessions for workplaces that want a fun event for their employees, and in-person antiperfection watercolour groups in the Peak District and Sheffield City Centre.
Higher cost - Amazing full day and week long retreats are a beautiful thing for skill development and calm brain time. Look for ones near you or combine with a weekend away!
Other useful things when you're getting started are: water (surprise!), I'd recommend two jars at a time, one for cleaning brushes and one for getting clean water from. Masking tape for sticking your paper down. Also kitchen towel for dabbing and correcting. A bit of salt for effects is optional... and a million other fun things which I could create a separate post for if you've found this useful! Let me know when you'd like more fun tools and supplies recommended!
Cheerio for now,
Cat x
If you're just starting out, you might like these blog posts too...